SpringBoot之Quartz实战
思考集结处 2020-06-09 Quartz
SpringBoot之Quartz基础
# SpringBoot之Quartz实战
说明:由于上篇文章我们已经讨论过springboot整合Quartz及相关配置,本次我们只说明Qrtz的增、删、改、启动、停止相关api的使用,其中涉及的其他技术,如:mybatisplus等技术以后进行专题讨论。 阅读本篇文章,建议您先看上一篇文章:
# 定时任务操作
参数:job的类全路径、job所属组、job的执行时间(cron表达式),这里对这些参数进行封装为一个接收前端参数的QuartzVo,如下:
@Data
public class QuartzVo {
    /**
     * 定时任务类全称
     */
    private String jobClassName;
    /**
     * 定时任务所属组
     */
    private String jobGroupName;
    /**
     * cron 表达式
     */
    private String cron;
}
1
2
3
4
5
6
7
8
9
10
11
12
13
14
15
2
3
4
5
6
7
8
9
10
11
12
13
14
15
# 编码
- controller 层
@Controller
public class JobController extends BaseController {

    @Autowired
    JobService jobService;
    @Autowired
    QrtzJobDetailsService qrtzJobDetailsService;

    @RequestMapping({"", "/"})
    public String index() {
        return "/view/index";
    }

    @GetMapping("/query/jobs")
    @ResponseBody
    public Result query() {
        List<QrtzJobDetails> list = qrtzJobDetailsService.list(new QueryWrapper<QrtzJobDetails>()
                .eq("SCHED_NAME", "clusteredScheduler")
        );
        return Result.success(list);
    }


    @PostMapping("/job/add")
    @ResponseBody
    public Result addJob(@RequestBody QuartzVo quartzVo) throws Exception {
        Result result = jobService.addJob(quartzVo.getJobClassName(), quartzVo.getJobGroupName(), quartzVo.getCron());
        return result;

    }

    @PostMapping("/job/delete")
    @ResponseBody
    public Result deleteJob(@RequestBody QuartzVo quartzVo) throws SchedulerException {
        Result result = jobService.deleteJob(quartzVo.getJobClassName(), quartzVo.getJobGroupName());
        return result;
    }

    @PostMapping("/job/update")
    @ResponseBody
    public Result updateJob(@RequestBody QuartzVo quartzVo) throws SchedulerException {
        Result result = jobService.updateJob(quartzVo.getJobClassName(), quartzVo.getJobGroupName(), quartzVo.getCron());
        return result;
    }

    @PostMapping("/job/start")
    @ResponseBody
    public Result startJob(@RequestBody QuartzVo quartzVo) throws SchedulerException {
        Result result = jobService.startJob(quartzVo.getJobClassName(), quartzVo.getJobGroupName());
        return result;
    }

    @PostMapping("job/stop")
    @ResponseBody
    public Result stopJob(@RequestBody QuartzVo quartzVo) throws SchedulerException {
        Result result = jobService.stopJob(quartzVo.getJobClassName(), quartzVo.getJobGroupName());
        return result;
    }


}
1
2
3
4
5
6
7
8
9
10
11
12
13
14
15
16
17
18
19
20
21
22
23
24
25
26
27
28
29
30
31
32
33
34
35
36
37
38
39
40
41
42
43
44
45
46
47
48
49
50
51
52
53
54
55
56
57
58
59
60
61
2
3
4
5
6
7
8
9
10
11
12
13
14
15
16
17
18
19
20
21
22
23
24
25
26
27
28
29
30
31
32
33
34
35
36
37
38
39
40
41
42
43
44
45
46
47
48
49
50
51
52
53
54
55
56
57
58
59
60
61
说明:controller层提供了一个查询定时任务的方法,其中用到的是mybatisplus的方法,后续我们专门出一个专题来聊这个技术。再往下就是定时任务的增、删、改、启动、暂停。几乎每一个方法都写了详细的注释大家直接看代码就行可以。
Result是我们统一返回给前端的数据封装,方便前端同学统一获取数据。
# Result类代码
@Data
public class Result implements Serializable {

    // 0成功,-1失败
    private int status;
    private String msg;
    private Object data;

    public static Result success() {
        return Result.success("操作成功", null);
    }

    public static Result success(Object data) {
        return Result.success("操作成功", data);
    }

    public static Result success(String msg, Object data) {
        Result result = new Result();
        result.status = 0;
        result.msg = msg;
        result.data = data;
        return result;
    }

    public static Result fail(String msg) {
        Result result = new Result();
        result.status = -1;
        result.data = null;
        result.msg = msg;
        return result;
    }

}
1
2
3
4
5
6
7
8
9
10
11
12
13
14
15
16
17
18
19
20
21
22
23
24
25
26
27
28
29
30
31
32
33
2
3
4
5
6
7
8
9
10
11
12
13
14
15
16
17
18
19
20
21
22
23
24
25
26
27
28
29
30
31
32
33
- serviceImpl 代码
@Service
public class JobServiceImpl implements JobService {

    @Autowired
    Scheduler scheduler;
    /**
     * 新增job任务
     *
     * @param jobName      job名称
     * @param jobGroupName job分组名称
     * @param cron         cron 表达式
     * @throws SchedulerException
     */
    public Result addJob(String jobName, String jobGroupName, String cron) throws Exception {
        //构建job信息
        JobDetail jobDetail = JobBuilder.newJob(getClass(jobName).getClass()).withIdentity(jobName, jobGroupName).build();
        //cron表达式调度器构建
        CronScheduleBuilder scheduleBuilder = CronScheduleBuilder.cronSchedule(cron);
        //构建 Trigger
        CronTrigger cronTrigger = TriggerBuilder.newTrigger().withIdentity(jobName, jobGroupName).withSchedule(scheduleBuilder).build();
        Date date = scheduler.scheduleJob(jobDetail, cronTrigger);
        if (date==null){
            return Result.fail("添加定时任务失败");
        }
        return Result.success();
    }


    /**
     * 删除定时任务
     *
     * @param jobName  任务名称
     * @param jobGroup 任务分组
     * @throws SchedulerException
     */
    public Result deleteJob(String jobName, String jobGroup) throws SchedulerException {
        TriggerKey triggerKey = TriggerKey.triggerKey(jobName, jobGroup);
        scheduler.pauseTrigger(triggerKey);
        scheduler.unscheduleJob(triggerKey);
        JobKey jobKey = JobKey.jobKey(jobName, jobGroup);
        boolean deleteJob = scheduler.deleteJob(jobKey);
        if (deleteJob){
            return Result.fail("删除定时任务失败");
        }
        return Result.success();
    }

    /**
     * 修改定时任务
     *
     * @param jobName      job名称
     * @param jobGroupName job分组名称
     * @param cron         cron 表达式
     */
    public Result updateJob(String jobName, String jobGroupName, String cron) throws SchedulerException {
        TriggerKey triggerKey = TriggerKey.triggerKey(jobName, jobGroupName);
        CronScheduleBuilder scheduleBuilder = CronScheduleBuilder.cronSchedule(cron);
        CronTrigger trigger = (CronTrigger) scheduler.getTrigger(triggerKey);
        //重新构建表达式trigger
        trigger = trigger.getTriggerBuilder().withIdentity(triggerKey).withSchedule(scheduleBuilder).build();
        Date date = scheduler.rescheduleJob(triggerKey, trigger);
        if (date==null){
            return Result.fail("添加定时任务失败");
        }
        return Result.success();

    }

    /**
     * 启动定时任务
     * @param jobClassName 任务名称
     * @param jobGroupName 任务所属组
     * @return
     * @throws SchedulerException
     */
    @Override
    public Result startJob(String jobClassName, String jobGroupName) throws SchedulerException {
        scheduler.resumeJob(JobKey.jobKey(jobClassName,jobGroupName));
        return Result.success();
    }

    /**
     * 停止定时任务
     * @param jobClassName 任务名称
     * @param jobGroupName 任务所属组
     * @return
     * @throws SchedulerException
     */
    @Override
    public Result stopJob(String jobClassName, String jobGroupName) throws SchedulerException {
        scheduler.pauseJob(JobKey.jobKey(jobClassName,jobGroupName));
        return Result.success();
    }


    private BaseJob getClass(String jobName) throws Exception {
        Class<?> class1 = Class.forName(jobName);
        return (BaseJob) class1.newInstance();
    }

}
1
2
3
4
5
6
7
8
9
10
11
12
13
14
15
16
17
18
19
20
21
22
23
24
25
26
27
28
29
30
31
32
33
34
35
36
37
38
39
40
41
42
43
44
45
46
47
48
49
50
51
52
53
54
55
56
57
58
59
60
61
62
63
64
65
66
67
68
69
70
71
72
73
74
75
76
77
78
79
80
81
82
83
84
85
86
87
88
89
90
91
92
93
94
95
96
97
98
99
100
101
102
2
3
4
5
6
7
8
9
10
11
12
13
14
15
16
17
18
19
20
21
22
23
24
25
26
27
28
29
30
31
32
33
34
35
36
37
38
39
40
41
42
43
44
45
46
47
48
49
50
51
52
53
54
55
56
57
58
59
60
61
62
63
64
65
66
67
68
69
70
71
72
73
74
75
76
77
78
79
80
81
82
83
84
85
86
87
88
89
90
91
92
93
94
95
96
97
98
99
100
101
102
说明:增加定时任务,首先我们需要开发一个你的业务定时任务,在这里我们进行查询数据库中现在处在的定时任务。
# 创建基础定时任务接口
我们创建一个基础定时任务接口类BaseJob继承Job实现方法execute,代码如下:
public interface BaseJob extends Job {
    @Override
    void execute(JobExecutionContext context) throws JobExecutionException;
}
1
2
3
4
2
3
4
# 创建业务定时类:实现我们的基础定时接口类
@Component
@Slf4j
public class MyJob implements BaseJob {

    @Autowired
    QrtzJobDetailsService qrtzJobDetailsService;

    @Override
    public void execute(JobExecutionContext context) throws JobExecutionException {
        System.out.println("定时任务以启动");
        List<QrtzJobDetails> list = qrtzJobDetailsService.list(new QueryWrapper<QrtzJobDetails>()
                .eq("SCHED_NAME", "clusteredScheduler")
        );
        System.out.println(list);
        System.out.println("定时任务执行时间"+new Date());
    }
}
1
2
3
4
5
6
7
8
9
10
11
12
13
14
15
16
17
2
3
4
5
6
7
8
9
10
11
12
13
14
15
16
17
说明:其中的方法就是进行查询数据库库中现在存在的定时任务,并输出到控制台。
# 测试
# 添加定时任务
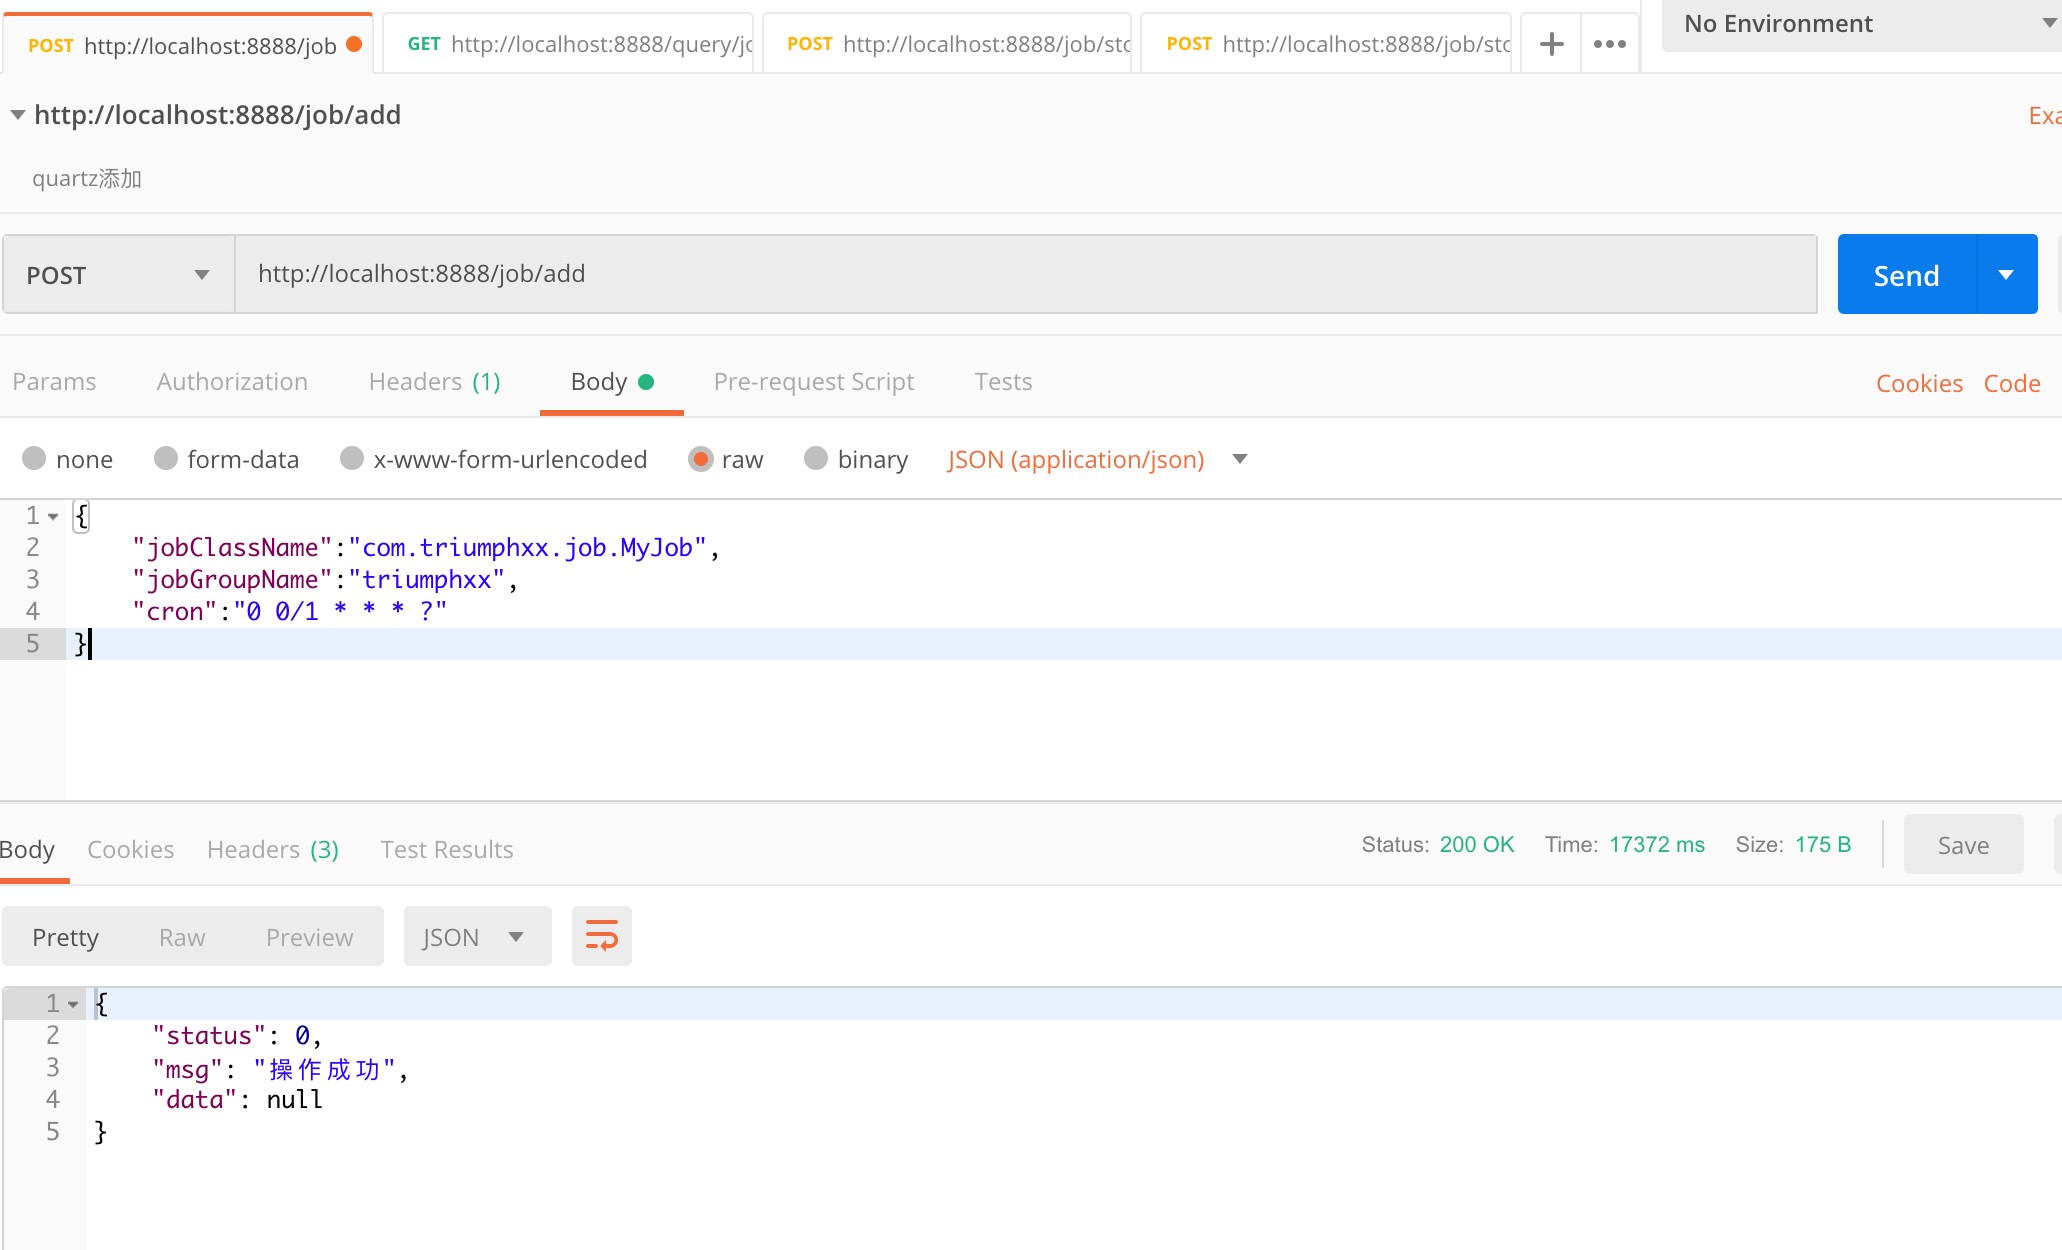
我们用postman进行接口测试。
显示操作成功,由于添加完成定时任务后,定时任务就会启动,我们来看控制台 
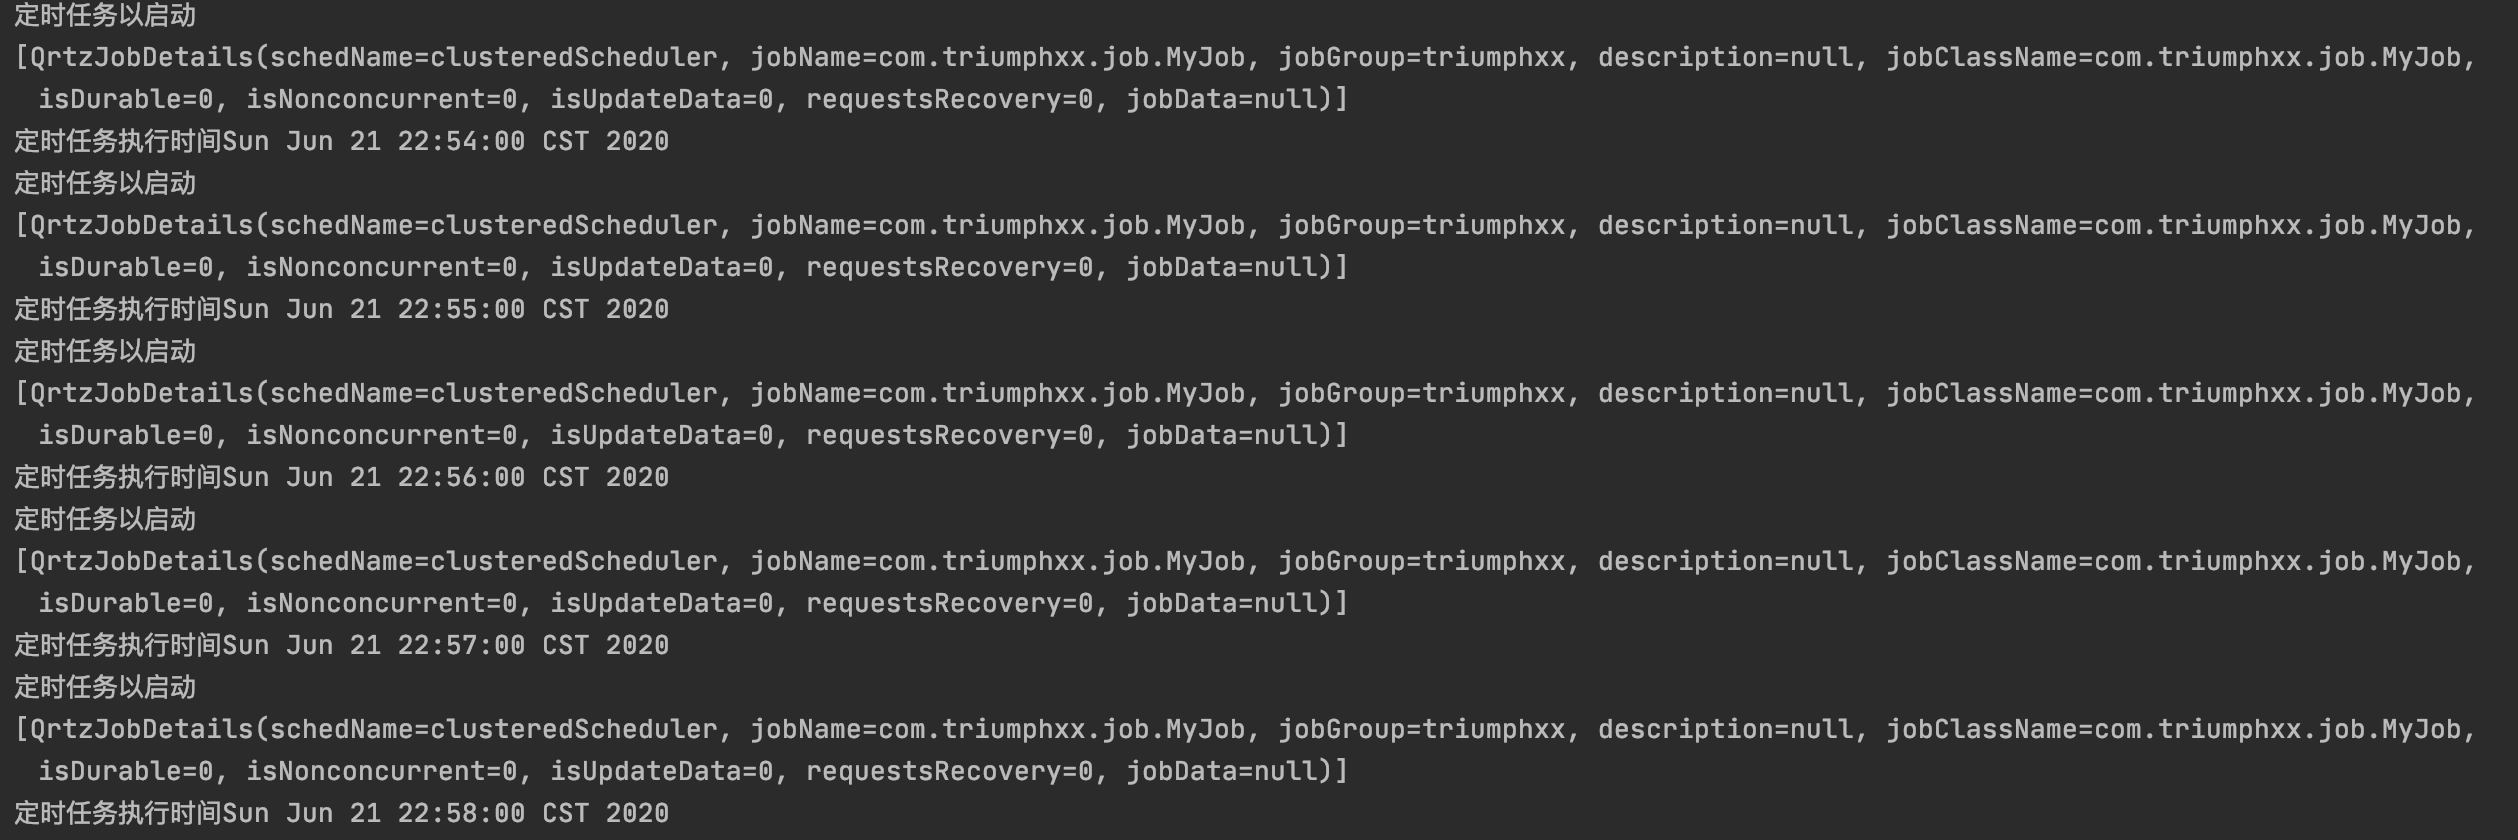
定时任务在开始执行,并且查询出来了我们刚添加的定时任务信息。
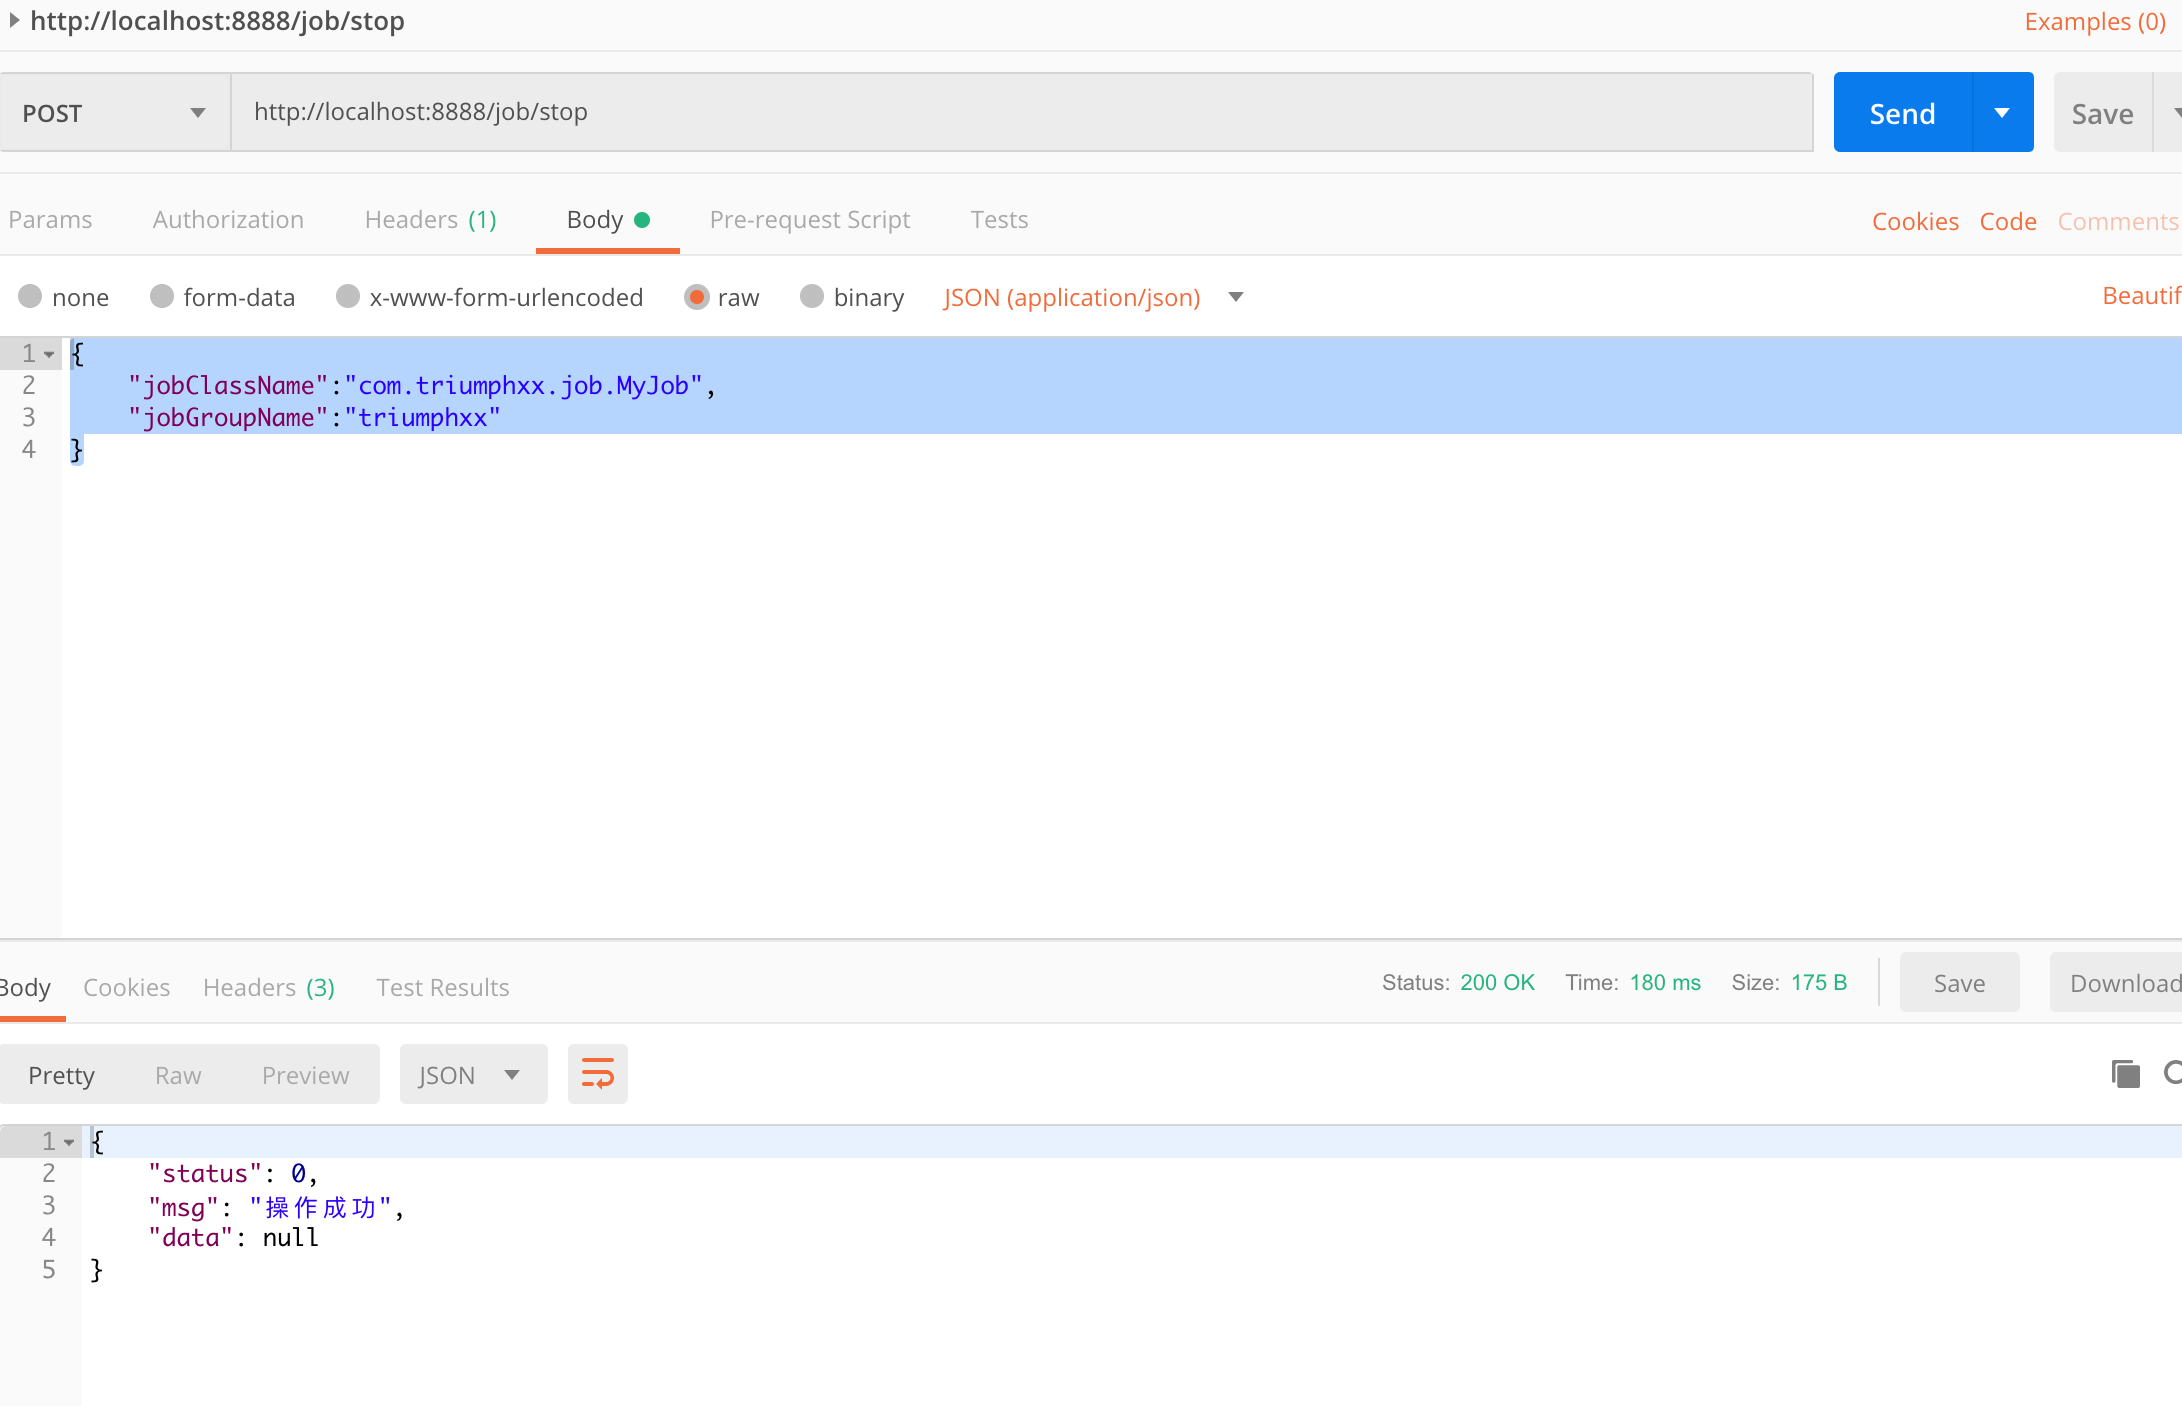
由于我设置的是一分钟执行一次,接下来我们测试暂停定时任务;

还是利用postman进行测试
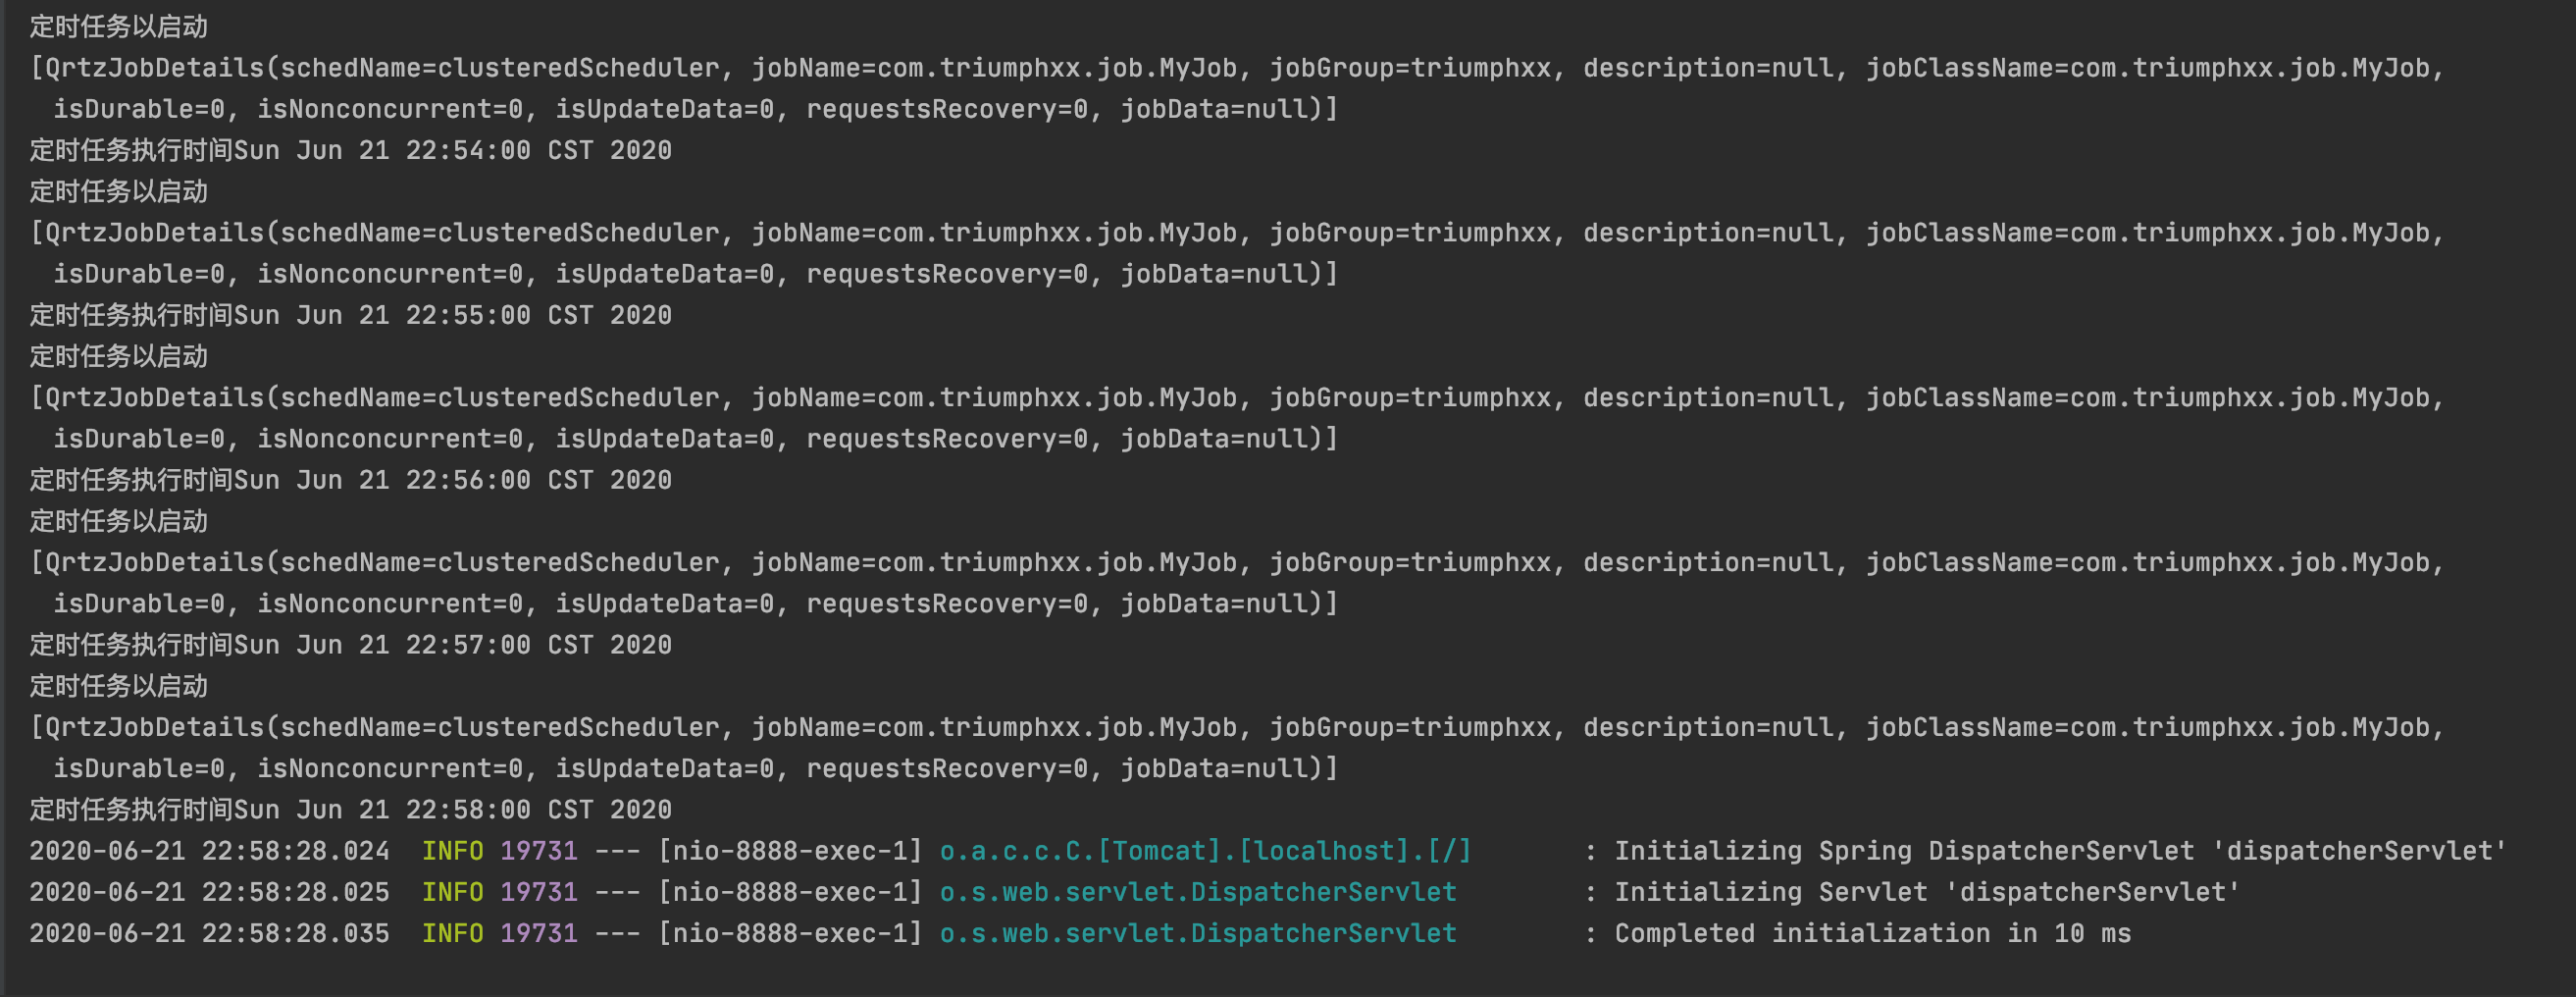
定时任务已经暂停:

下面的其他方法就不一一进行测试了,感兴趣的铜须可以自己测试一下。相关代码已经上传到本人的github地址:https://github.com/triumphxx/spring-boot-quartz.git


